Settings
Backup and Restore
- 🗂️ This is an additional feature of the Maya Data Privacy product, accessible from the Settings menu in the side navigation.
- 💾 The purpose of the feature is to allow the user to take a backup of the tables before proceeding with anonymization. This gives users the option to revert to the original data if needed.
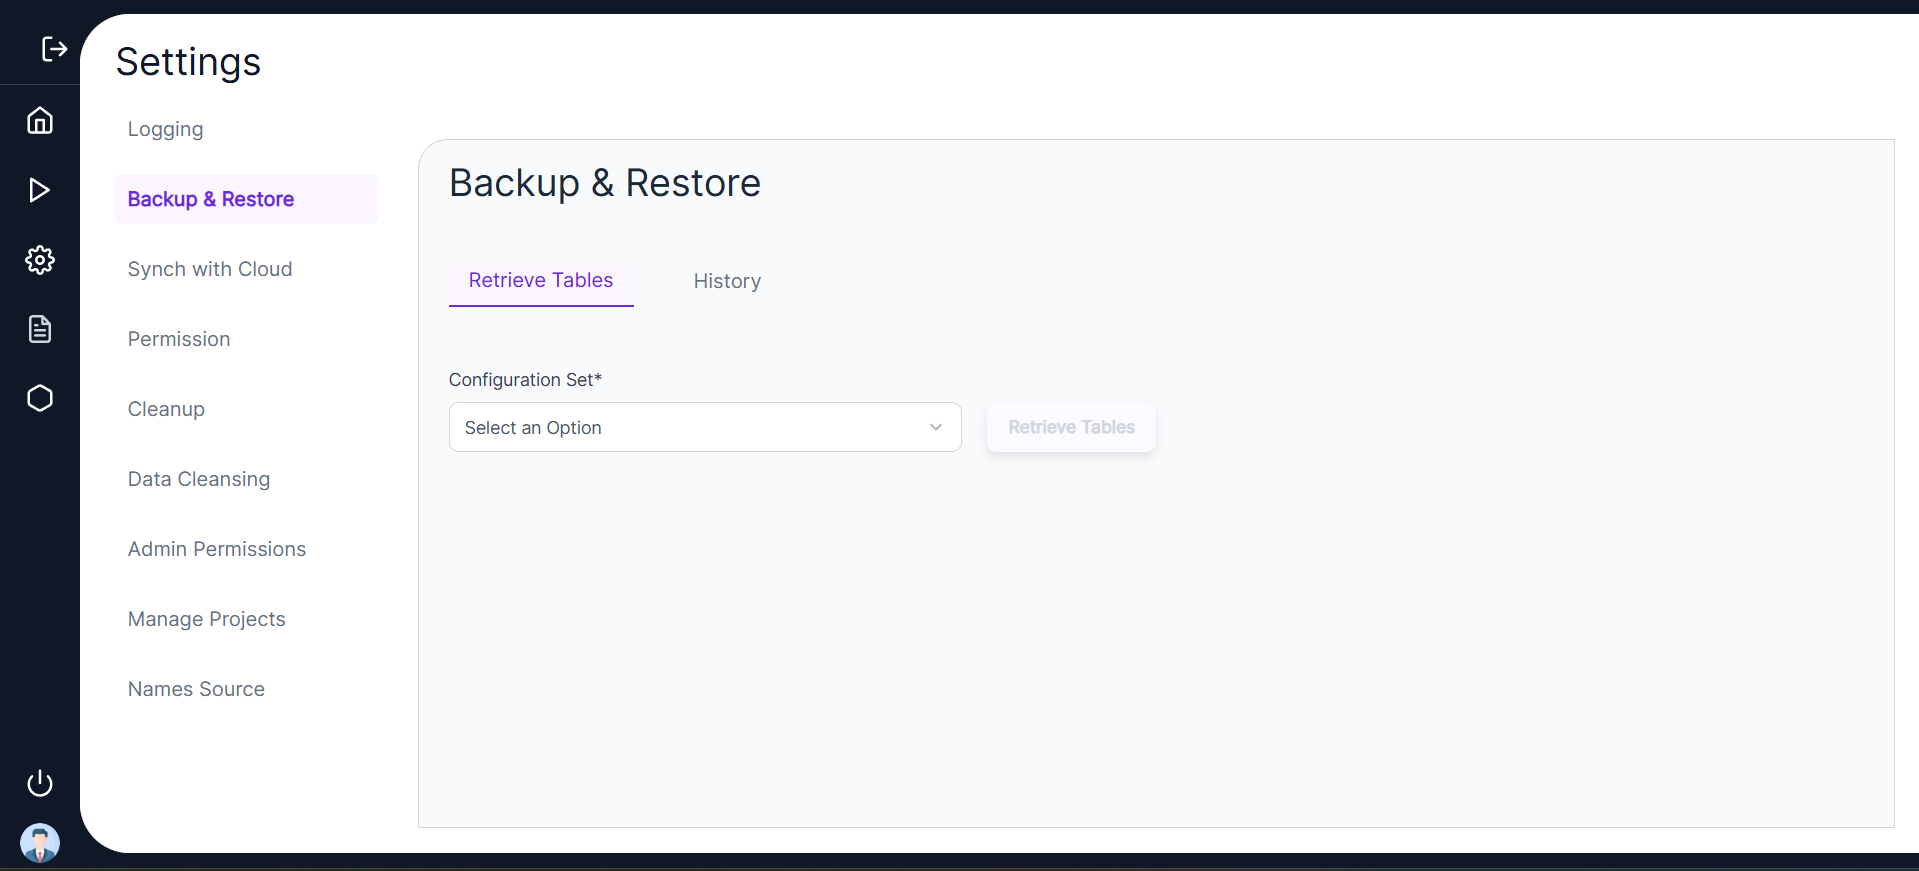
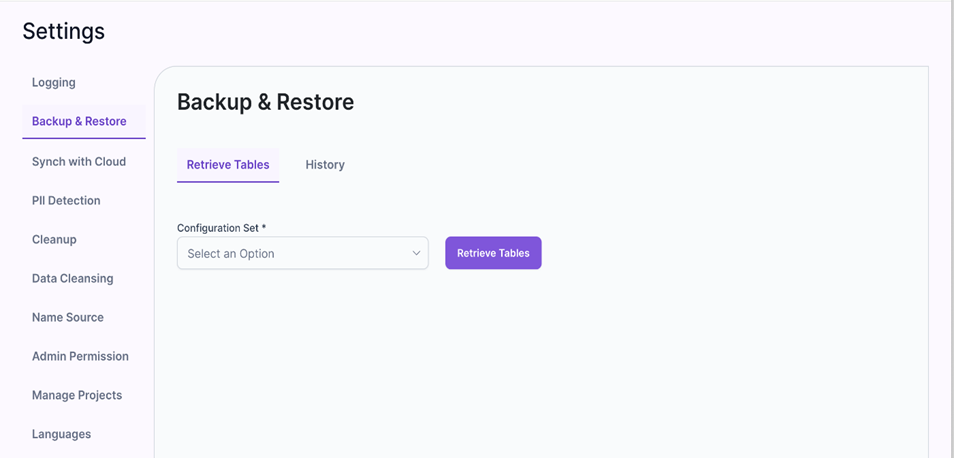
- 🔄 In the Retrieve Tables tab, the user can select the Configuration Set and click on Retrieve Tables to view all the tables on the schema for which a backup has been created.
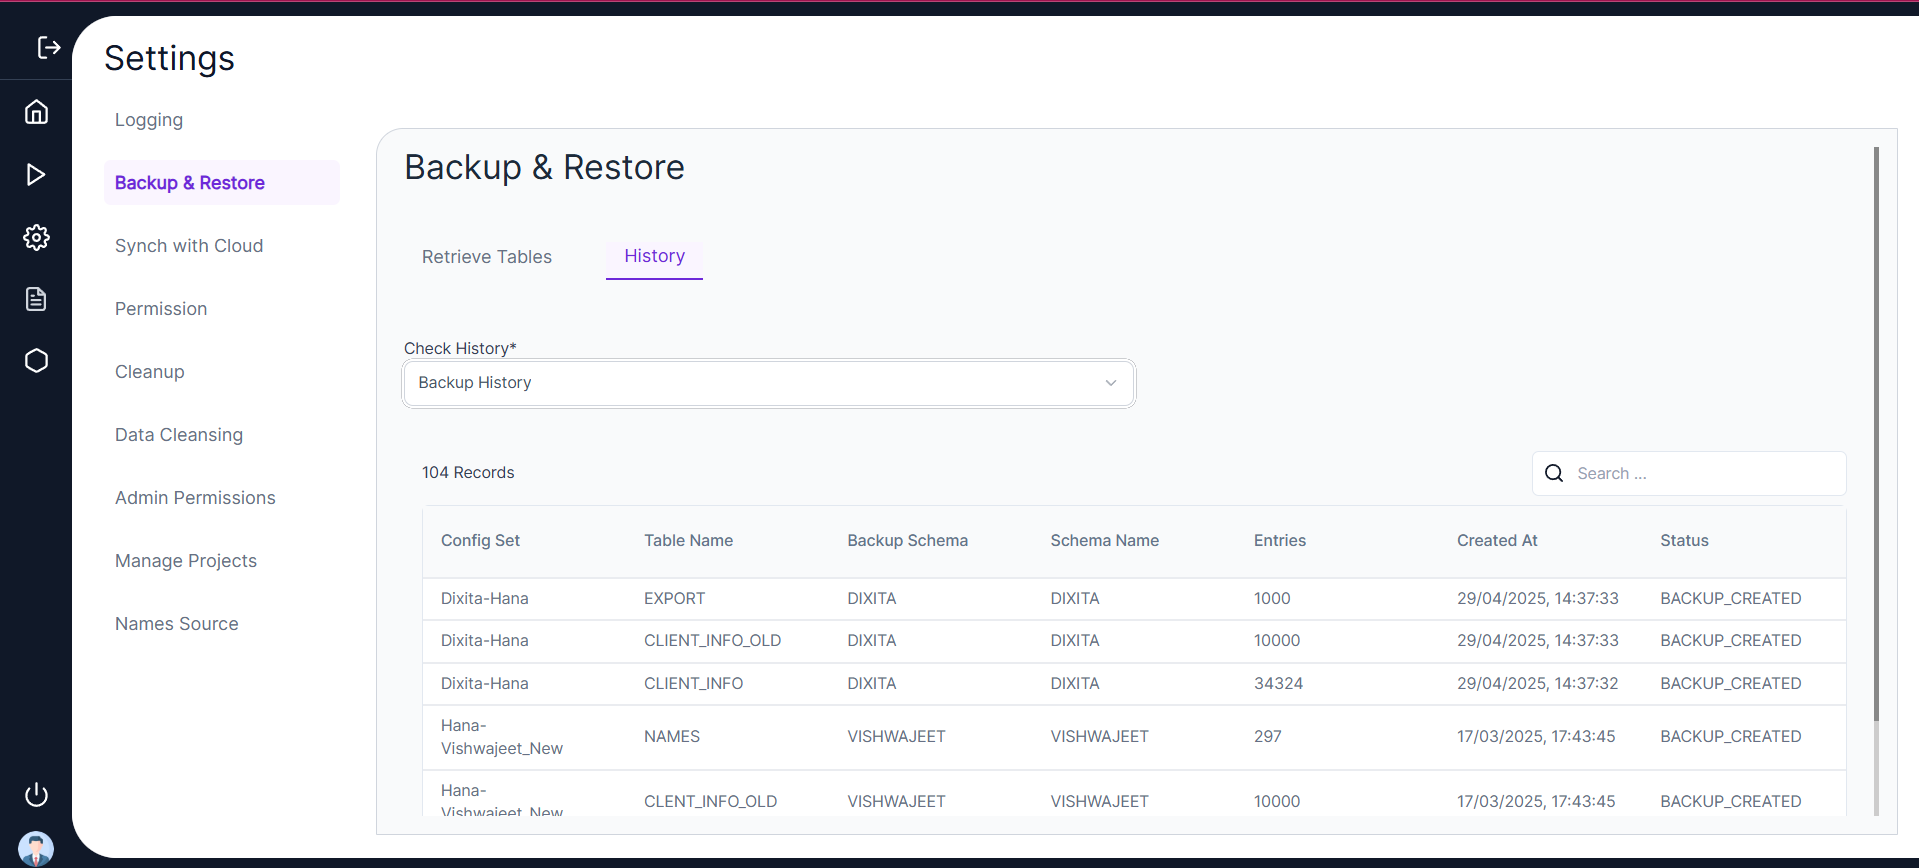
- 📝 Clicking Retrieve History allows the user to view the Table Name, Entries, Backup Date, and Backup Actions such as Redo, Delete, and Restore.
- 🗑️ Delete action deletes the Backup Table, Redo will redo the backup action, and Restore will restore the backup data to the original source table.

- ➕ To add a table for backup on a particular schema, the user needs to select the appropriate configuration set and click on Backup Additional Tables. A left panel will open where the user can enter table names separated by commas and click Backup.

- 📜 The user can view the history of all backup, redo, restore, and delete actions under the History Tab.
- ⚙️ Backup can be created on the same schema or a different schema as shown below.
- How do you create a backup on a different schema?
- (Specific steps/details for creating a backup on a different schema can be added here).
PII Detection
- This is an additional feature of the Maya Data Privacy product, accessible from the ⚙️ Settings menu in the side navigation.
- The purpose of this feature is to set up PII Detection, Classification, and Transformation rules. These rules will act as default settings when you use Automated PII Detection while creating your utility sets. They can be applied to all types of utility sets, including:
- 🛠️ Databases in AppSafe AI Detection
- 📄 Files in FileSafe AI Detection
Example Usage
For instance, if the PII Engine detects a column in a table as Name, the utility condition will automatically be set to FIRST_NAME. Similarly, users can define utility parameters for other fields like:
- 📅 Dates
This makes managing PII data seamless and efficient across various applications! 🚀
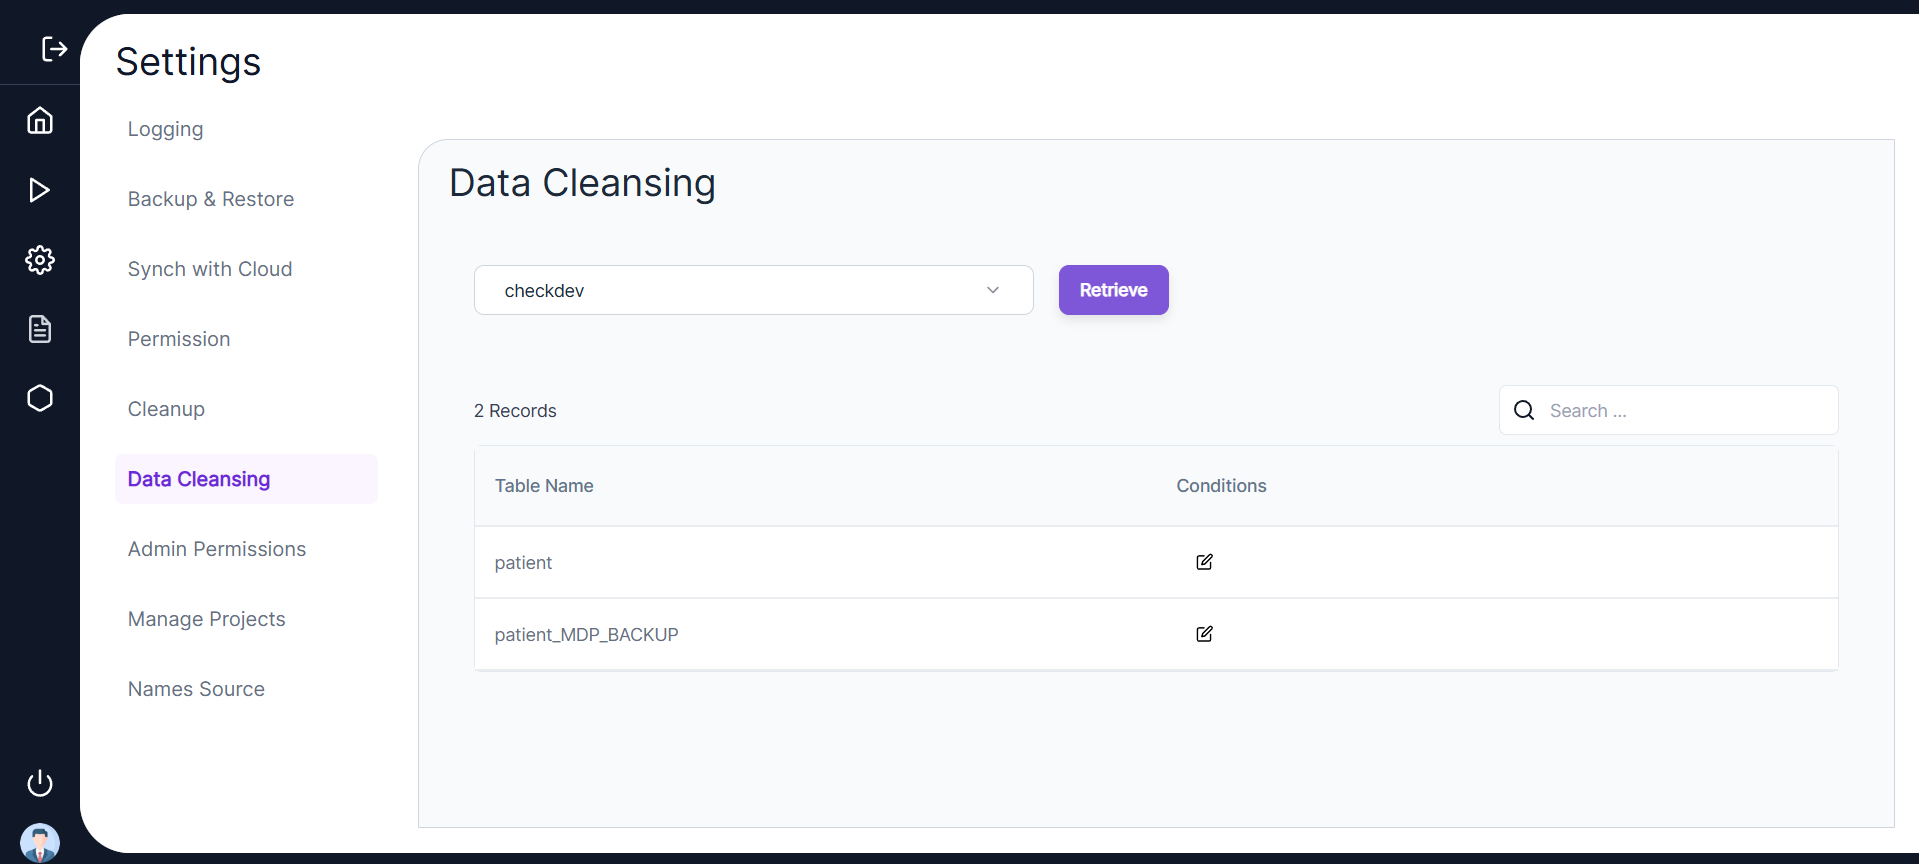
🧹 Data Cleansing
- This is an additional feature of the Maya Data Privacy product, accessible from the ⚙️ Settings menu in the side navigation.
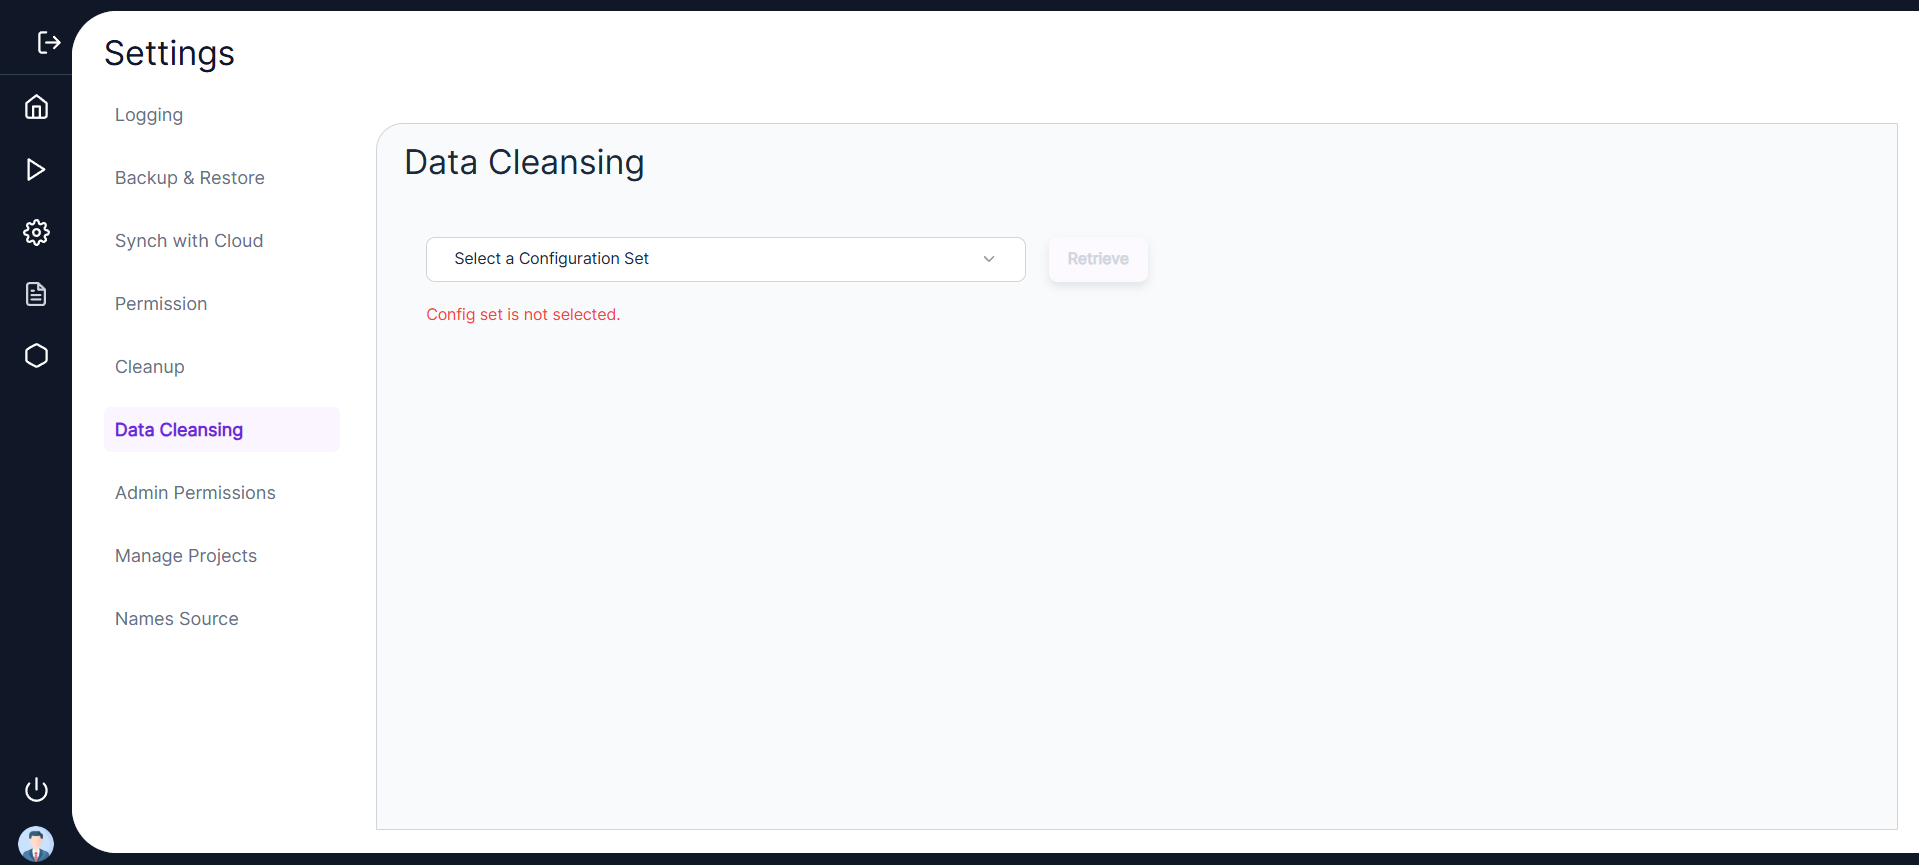
- The purpose of this feature is to allow the user/client to remove redundant data from the client database. It gives the user the option to truncate tables (including backup tables) once the data is no longer required.
- In the following Data Cleansing screen, users will be given the option to select a configuration set and retrieve all tables on it.
- Data cleansing is a UI-based approach provided to users to clean redundant data during the data transformation journey.
✨ Features of Data Cleansing
-
Select Configuration Set
In the following Data Cleansing screen, users will be given the option to select a configuration set and retrieve all tables on it.
-
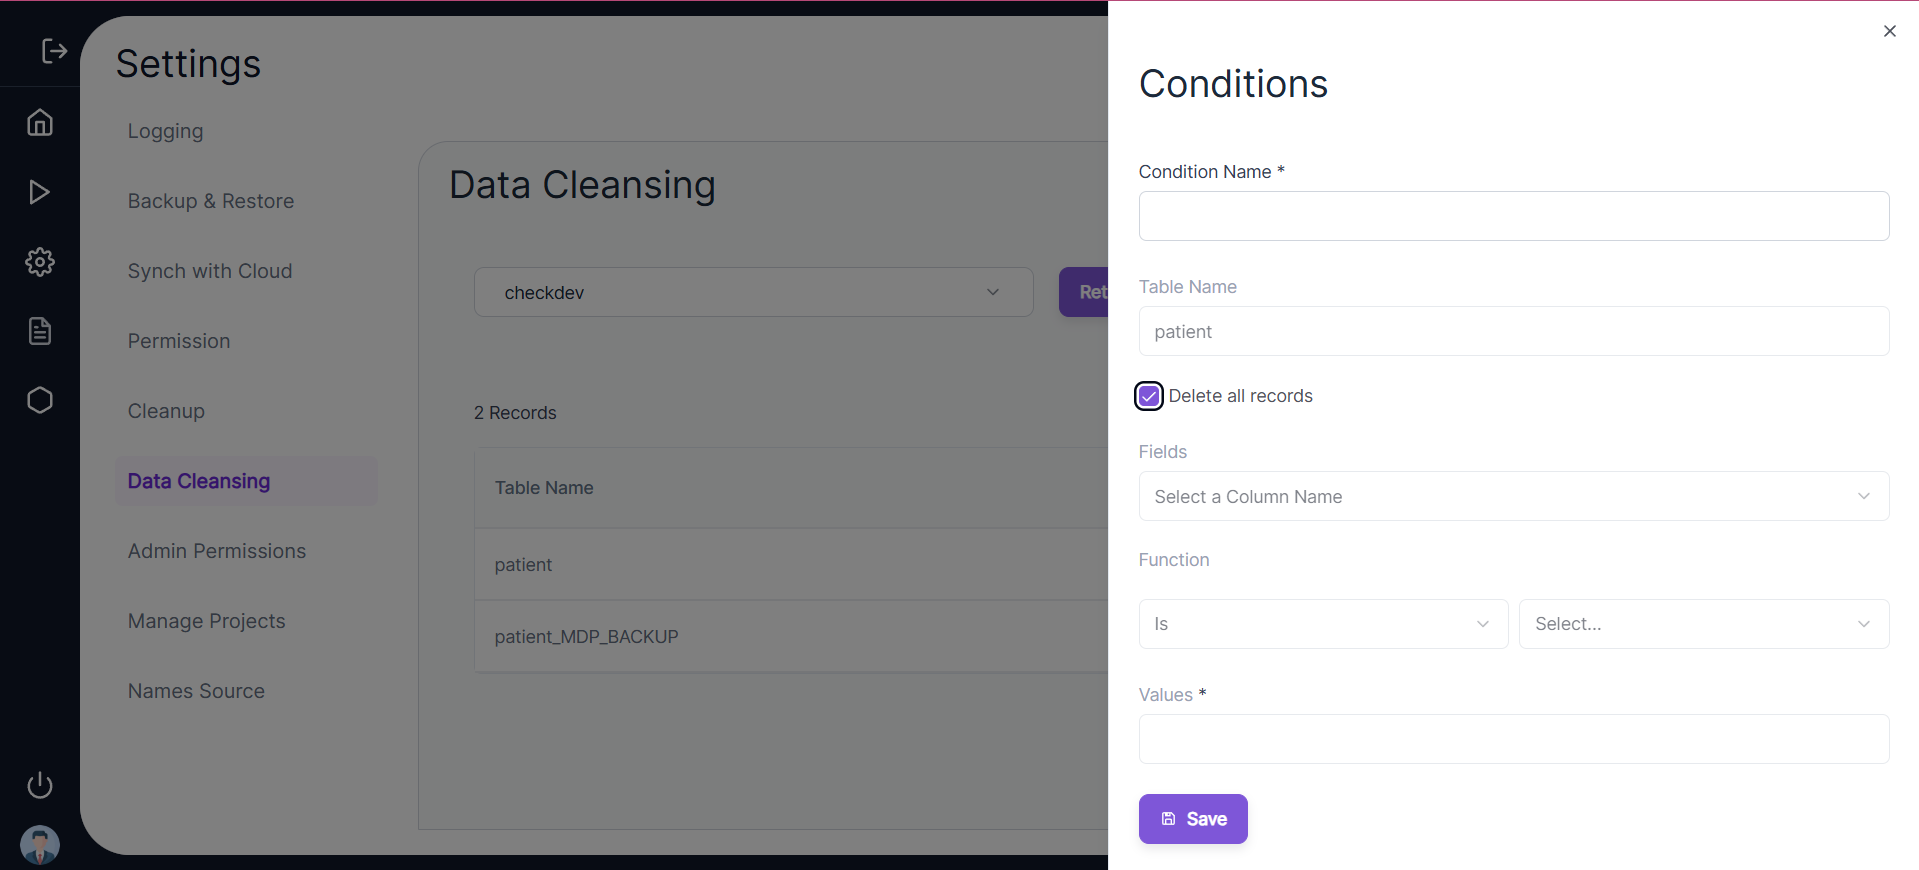
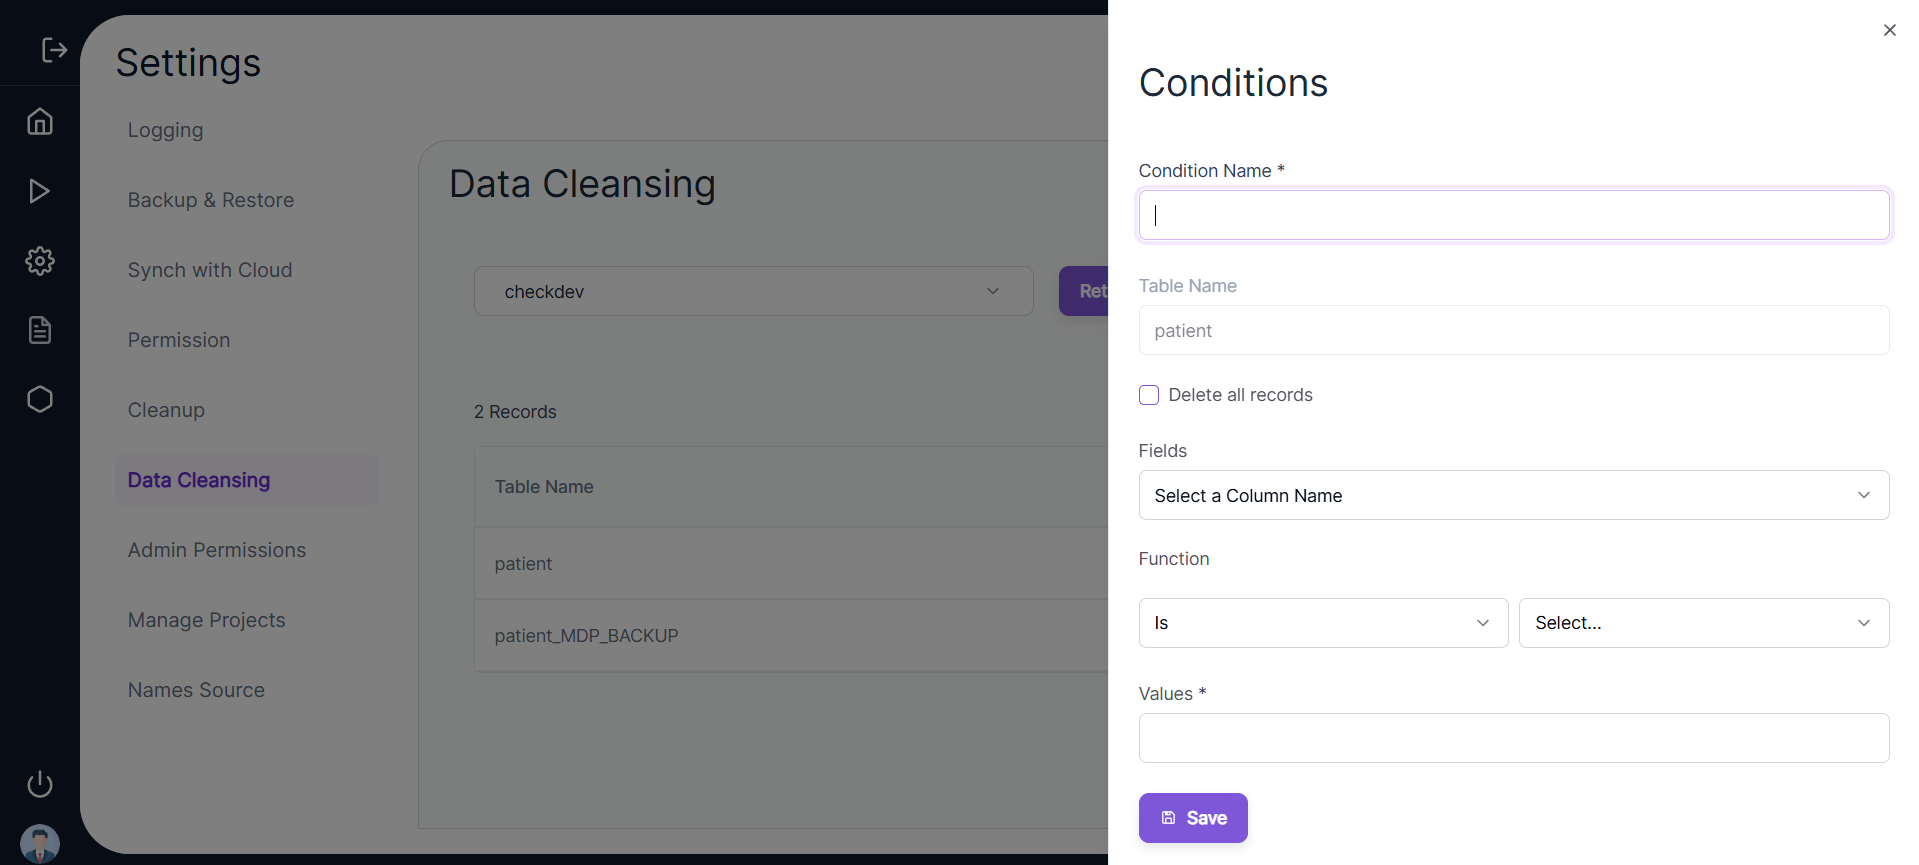
Edit and Set Rules
- Users can click on the ✏️ Edit icon on any table row and select the data cleansing rules.
- If the user enters a Condition Name and selects the “Delete all records” option, the table will be truncated, meaning the table structure will remain, but with zero rows.
-
Conditional Deletion
- If the user enters Fields (representing table columns) and applies a Function with specific Values, table rows will be deleted based on the condition defined.
- ⚠️ Note: The Values field is case-sensitive.
Data Cleanup
- This is an option available to the Super Admin user or the admin user to cleanup all data once the complete project implementation of the has been completed for a customer. It is a one-time activity.
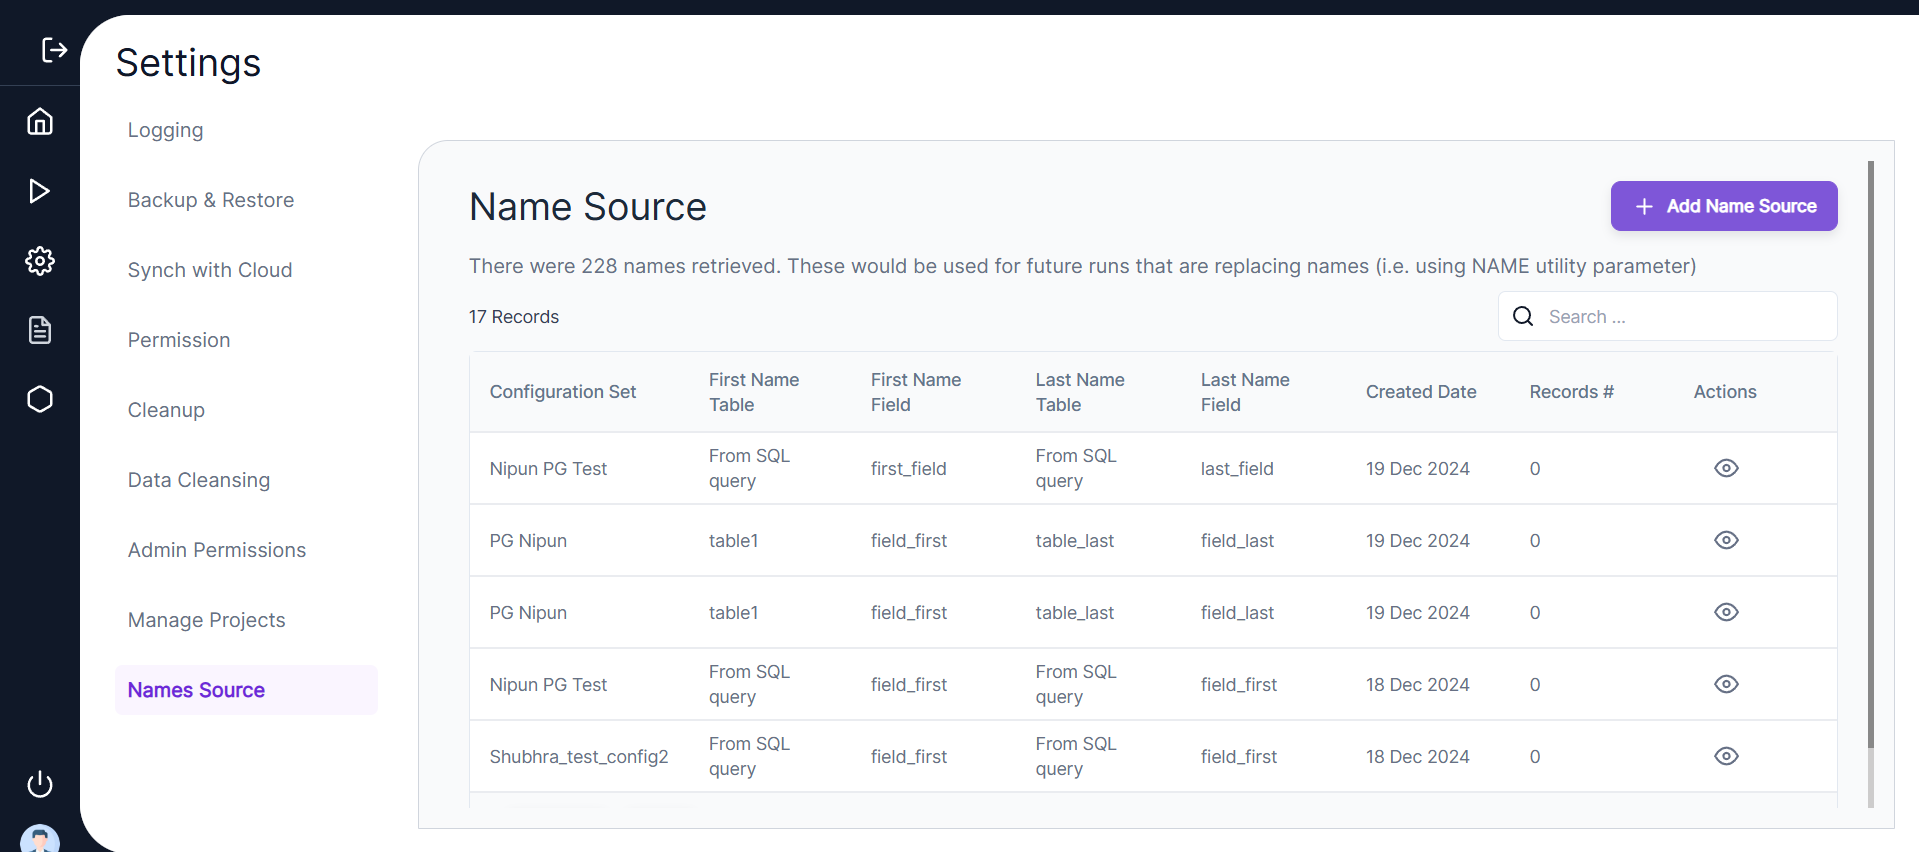
Name Source
- Name Source is an additional feature of the Maya Data Privacy product, accessible from the ⚙️ Settings menu in the side navigation.
- For example, Maya anonymizes names based on anonymization rules and reference data in AppSafe's databases. By defining the Name Source, the customer can provide the source of reference data for anonymization.
- This feature enables Maya to anonymize names based on a country or location, delivering more realistic anonymized data to clients.
- For a German customer, names will be anonymized to German names.
- For a Norwegian customer, names will be anonymized to Norwegian names, based on customer requirements.
🕒 Name Source History
-
The screen below displays a history of Name Sources that have already been created, providing options to view, delete, and create a Name Source.
-
The screen shows the following details for previously created Name Sources:
- Configuration Set
- First Name Column
- Last Name Column
- First Name Table
- Last Name Table
- Status
- Record Count
- Job Run Timestamp
- Actions
🔍 Viewing and Creating Name Sources
-
View Details
Users can click the 🔍 View icon to view details of a Name Source. -
Create a New Name Source
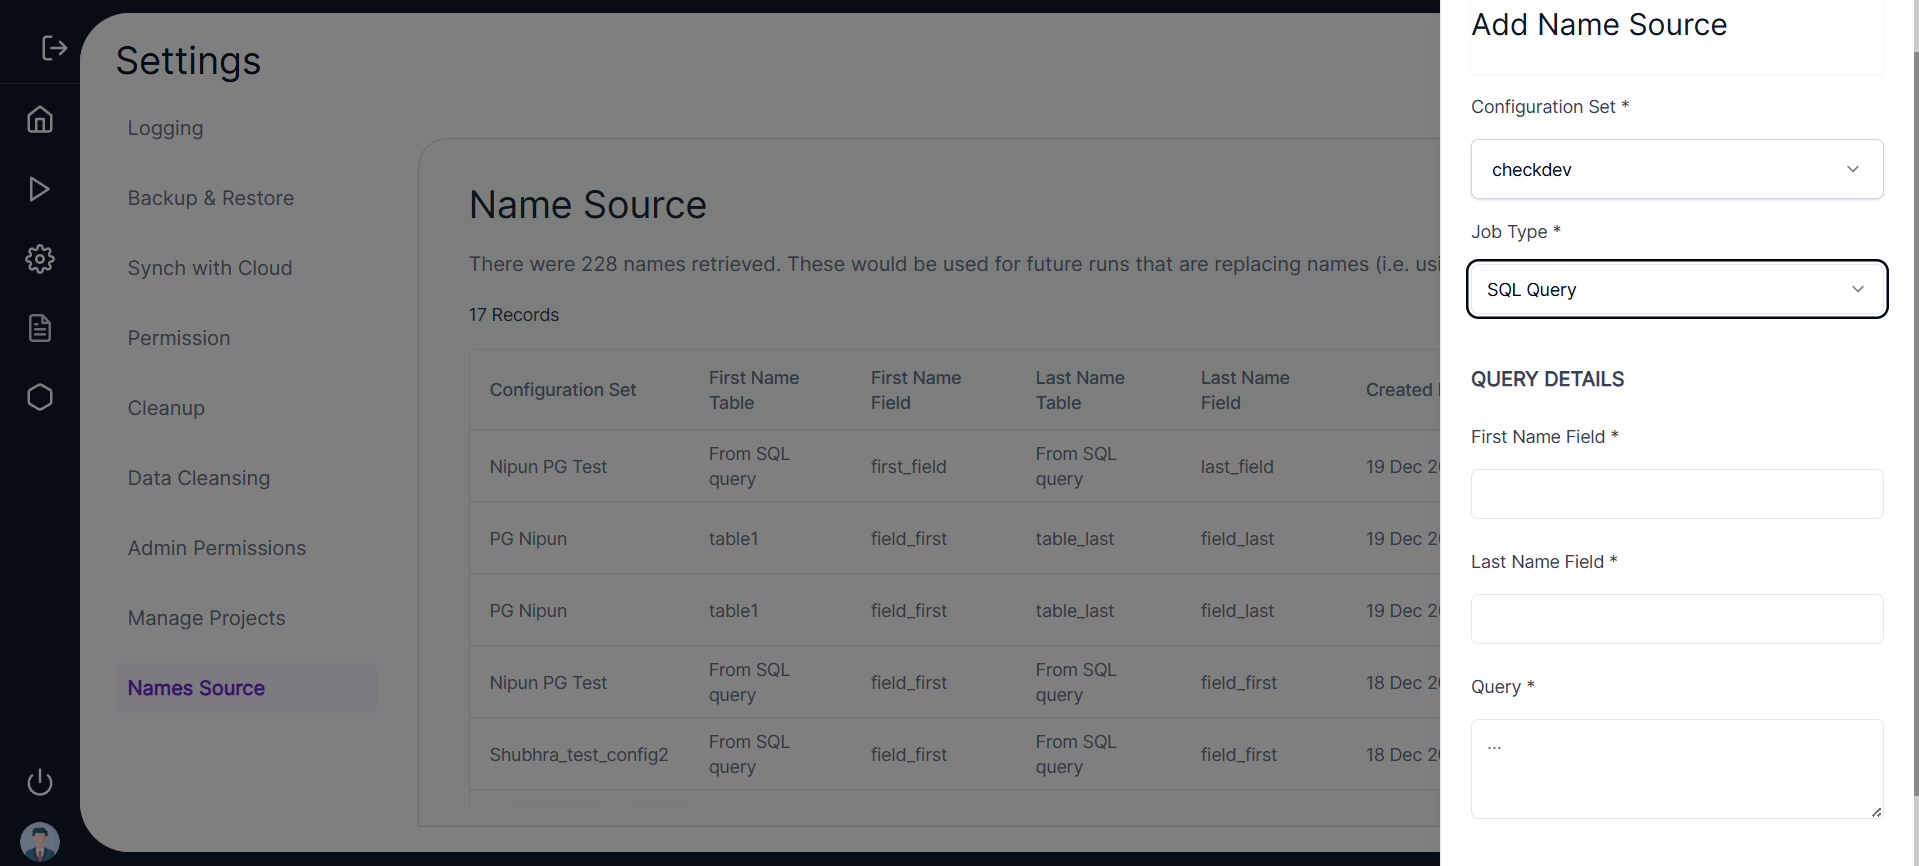
- Users can click Create to set up a new Name Source.
- In the Create Name Source screen, users will enter the Configuration Set Name.
- The Configuration Set defines the database connections and includes details about the source and target database type, host, and schema.
- The Source defines the customer database from which the first name and last name columns are copied, while the Target defines the AppSafe reference database for name anonymization.
✏️ Required Parameters
- First Name Column Name
- First Name Table Name
- Last Name Column Name
- Last Name Table Name
- Schema (optional):
- If left blank, the source schema details specified in the configuration set will be used by default.
- Users can select the First Name and Last Name from:
- Different tables 🗂️
- Different schemas 📁
🔧 SQL Query Option
- Users can also write an SQL SELECT query to fetch the First Name and Last Name columns.
💾 Saving the Name Source
- Clicking Save schedules the Name Source Job, and its status can be tracked in the UI.
- The job will:
- Identify all the unique First Name and Last Name combinations.
- Append the values to the target table.
🔑 Admin Permission
- This feature provides administrators with the ability to grant or restrict permissions for executing cautionary SQL queries such as:
DROP TABLEUPDATE_NO_WHEREDELETE_NO_WHERETRUNCATE_TABLE
🚫 Restrictions for Admin Users
- Even admin users cannot add or edit their own permissions via the application for security purposes.
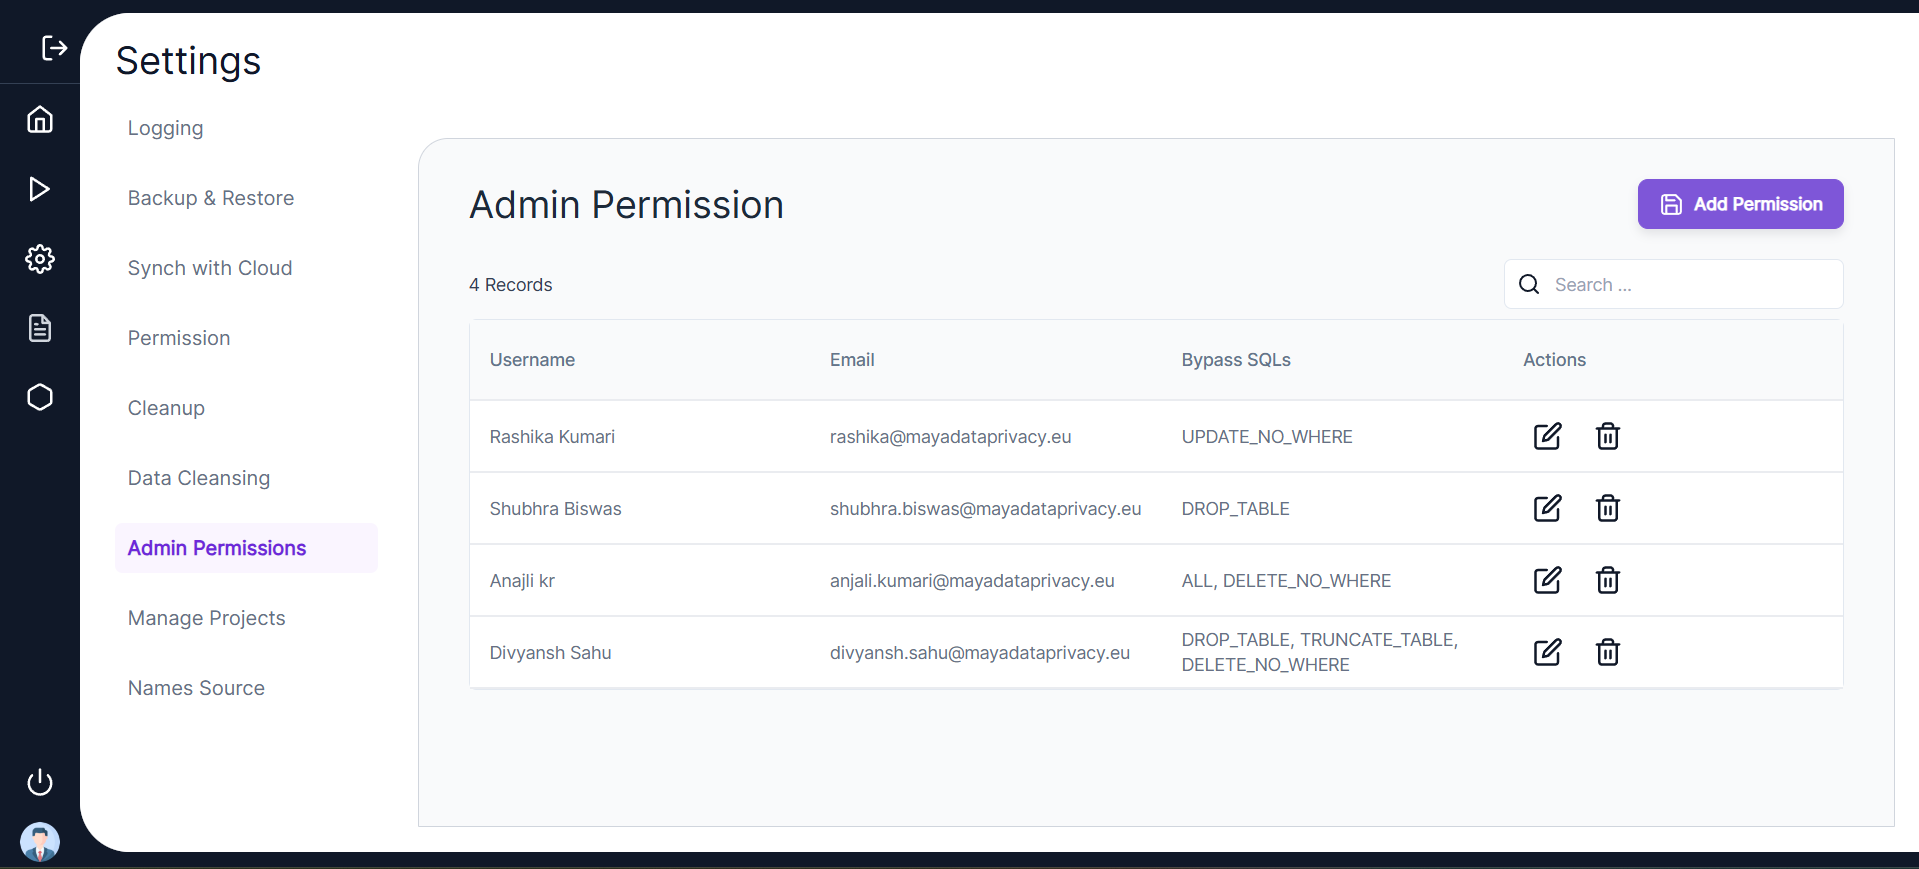
➕ Adding Permissions
- Click Add Permissions to assign permissions to another user.
⚙️ Setting Permissions
To configure permissions for a user, follow these steps:
- Select Username: Choose the user to whom permissions will be assigned.
- Select SQL Types: Choose from the following options:
- ALL
- DROP TABLE
- UPDATE_NO_WHERE
- DELETE_NO_WHERE
- TRUNCATE_TABLE
- Choose Bypass Type:
- RESTRICT: Prevents the user from bypassing cautionary queries.
- BYPASS: Allows the user to bypass those queries.
🔄 Updating Permissions
- If a user already has BYPASS permissions assigned and later needs to be restricted, the RESTRICT option can be selected.
- This will remove the previously assigned BYPASS permission and apply the restriction instead.