🛠️ Step 1: Create New Configuration Set
-
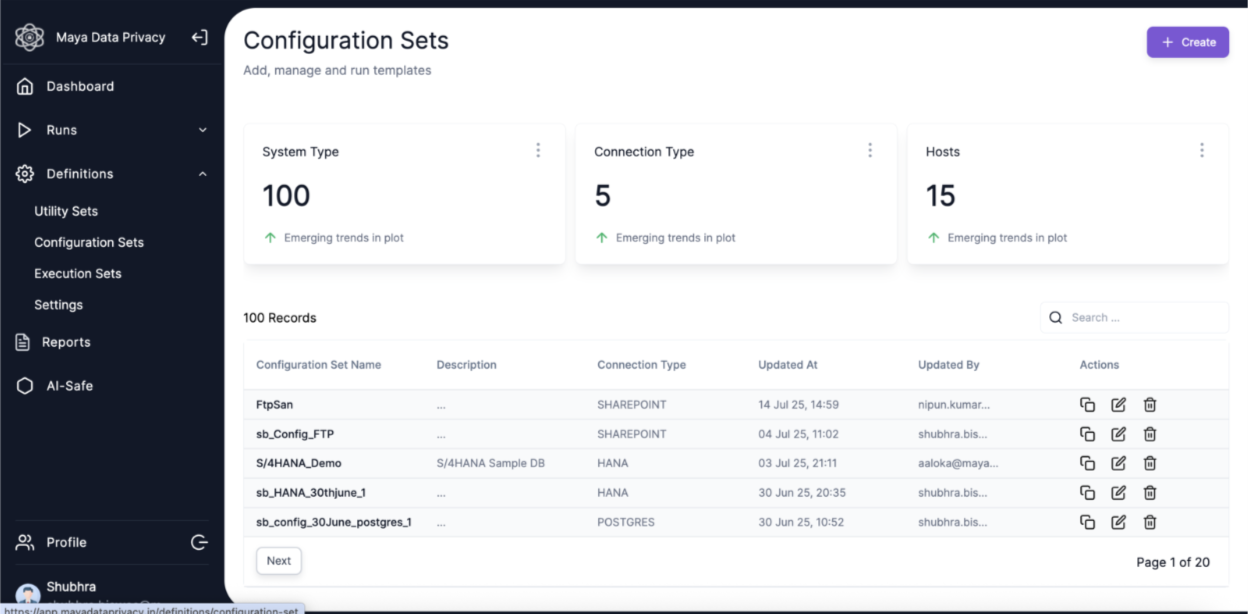
Navigate to Configuration Sets:
- Go to the Configuration Set webpage by selecting Configuration Sets from the Definitions in the side navigation bar.
-
Existing Configuration Sets:
- Users can view, edit, or copy existing Configuration Sets on this screen.
-
Create a New Configuration Set:
- Click on the Create button.
- Only Admin Users can create Configuration Sets.
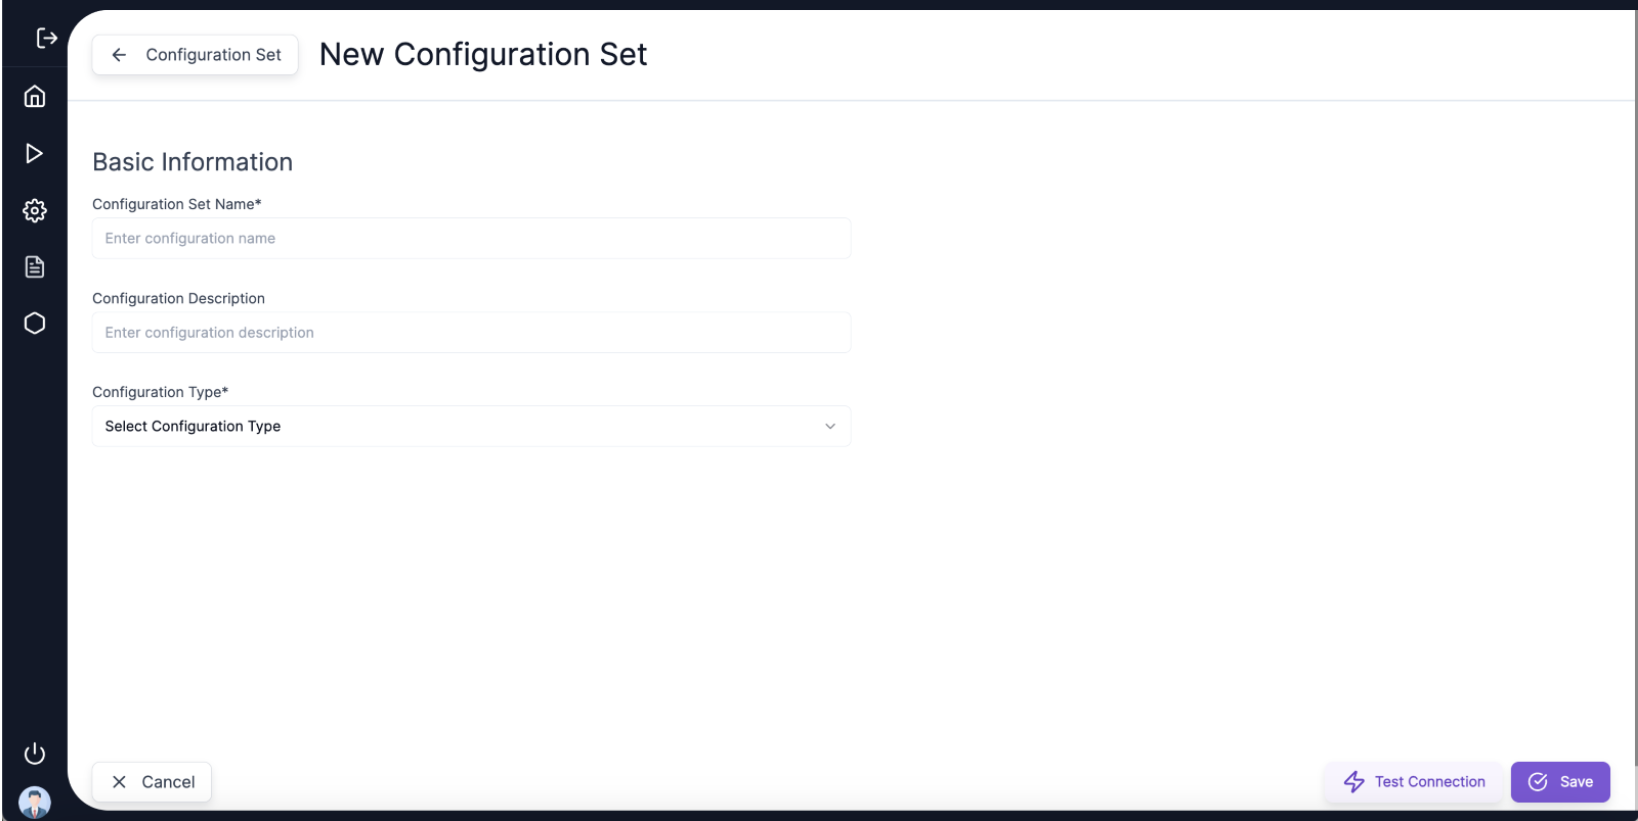
- Enter ConfigSet Name and Config Type which are mandatory parameters
- Config_Type can be selected as DATABASE or FTP
-
Enter Required Information:
- ConfigSet Name and Config Type are mandatory.
- Config_Type options:
- DATABASE
- FTP
For Config_Type: DATABASE
-
Enter Mandatory Parameters:
- Database Host
- Database Port
- Auth Type
- Database User
- Database Password
- Schema Name
-
Target Same as Source Checkbox:
- Checked: Source and Target Database will be the same.
- Unchecked: Source and Target Databases will differ, and you must fill in Target Database details.
-
Test the Connection:
- Click Test Connection to verify a successful connection.
-
Save the Configuration Set:
- Click Update and Save to confirm and proceed.
-
Edit, Delete, or Copy:
- Use the Edit Icon under the Actions column to update an existing Configuration Set.
- Use Delete or Copy for respective actions.
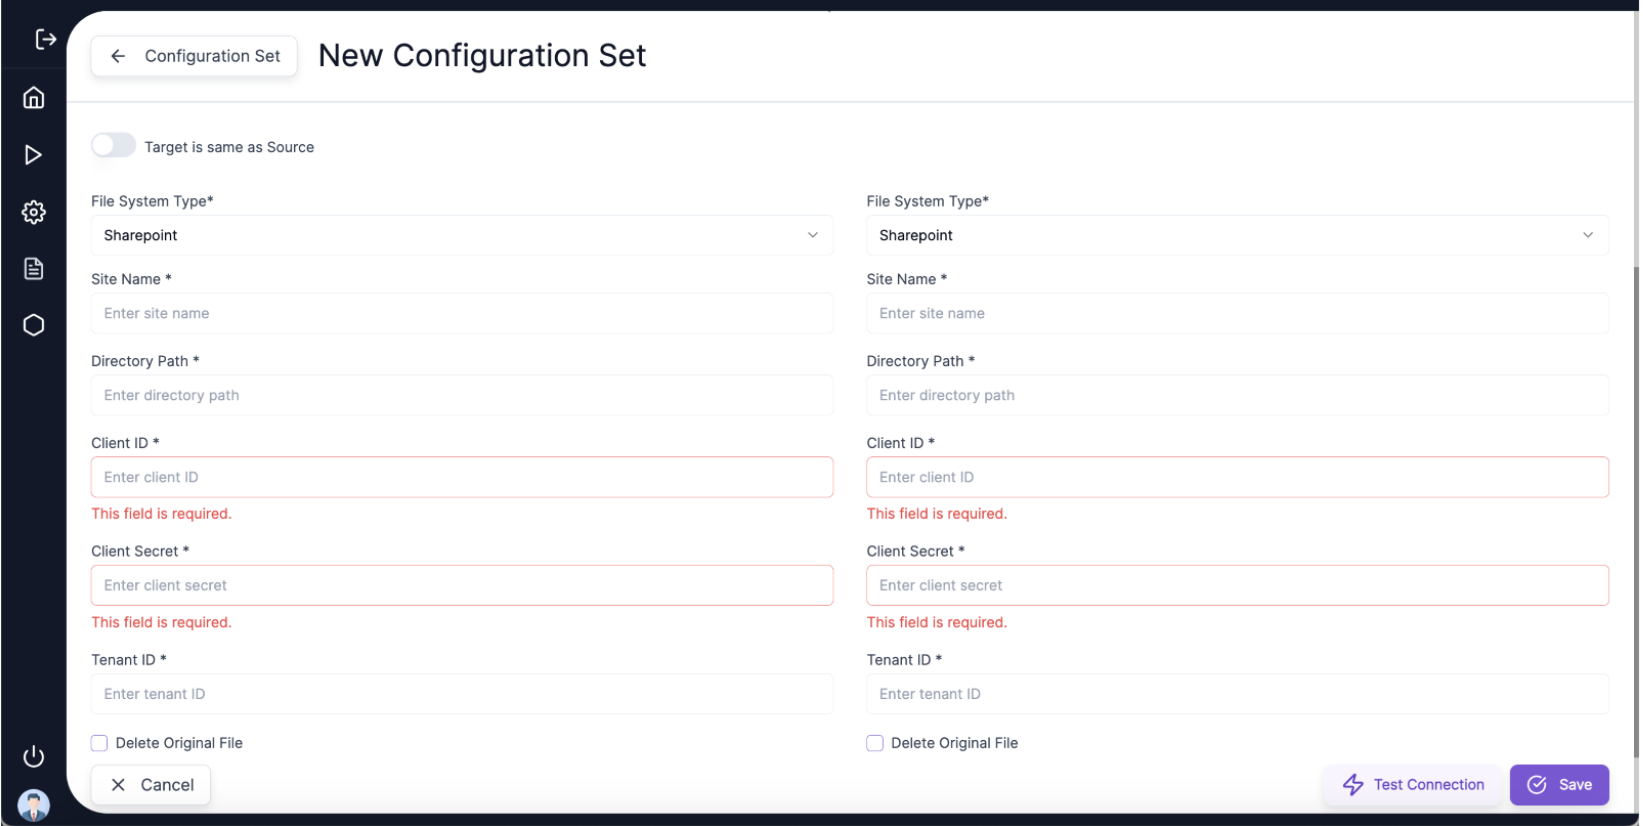
For Config_Type: FTP
-
Enter Mandatory Parameters:
- Filesystem Type: SHAREPOINT
- Site Name
- Directory Path
- Client ID
- Tenant ID
- Client Secret
-
FTP Anonymization:
- Allows anonymizing single or multiple files from the Source Folder to the Target Folder in SharePoint.
- Source and Target folders can be the same.